Stream layout
Twitch Stream Overlay Size: 1920x1080 Layout and Safe Zones
Build a Twitch overlay that fits OBS, keeps gameplay readable, and scales cleanly from a 1080p working canvas to lower output resolutions.
1. Recommended Twitch stream overlay size
Use 1920×1080 pixels as the master canvas for a standard horizontal Twitch overlay. It is a 16:9 layout, matches a common OBS base canvas, and can be scaled down cleanly to 1280×720 without changing the composition. An overlay does not have a separate upload-size rule inside Twitch because it is assembled in broadcasting software before the video reaches the platform.
The overlay should match the scene canvas, not the physical monitor. If OBS uses a 2560×1440 base canvas, create the overlay at 2560×1440 or scale a 1920×1080 design precisely. For vertical video, create a separate 1080×1920 layout rather than stretching the horizontal overlay.
| Use | Canvas | Best practice |
|---|---|---|
| Standard horizontal stream | 1920×1080 | Recommended master for most 16:9 scenes |
| Lower-resource stream | 1280×720 | Use when the OBS base canvas is genuinely 720p |
| 1440p production | 2560×1440 | Match a 1440p base canvas and test scaled output |
| Vertical companion scene | 1080×1920 | Build separately; do not crop a horizontal overlay blindly |
2. Safe zones for gameplay, webcam, alerts, and chat
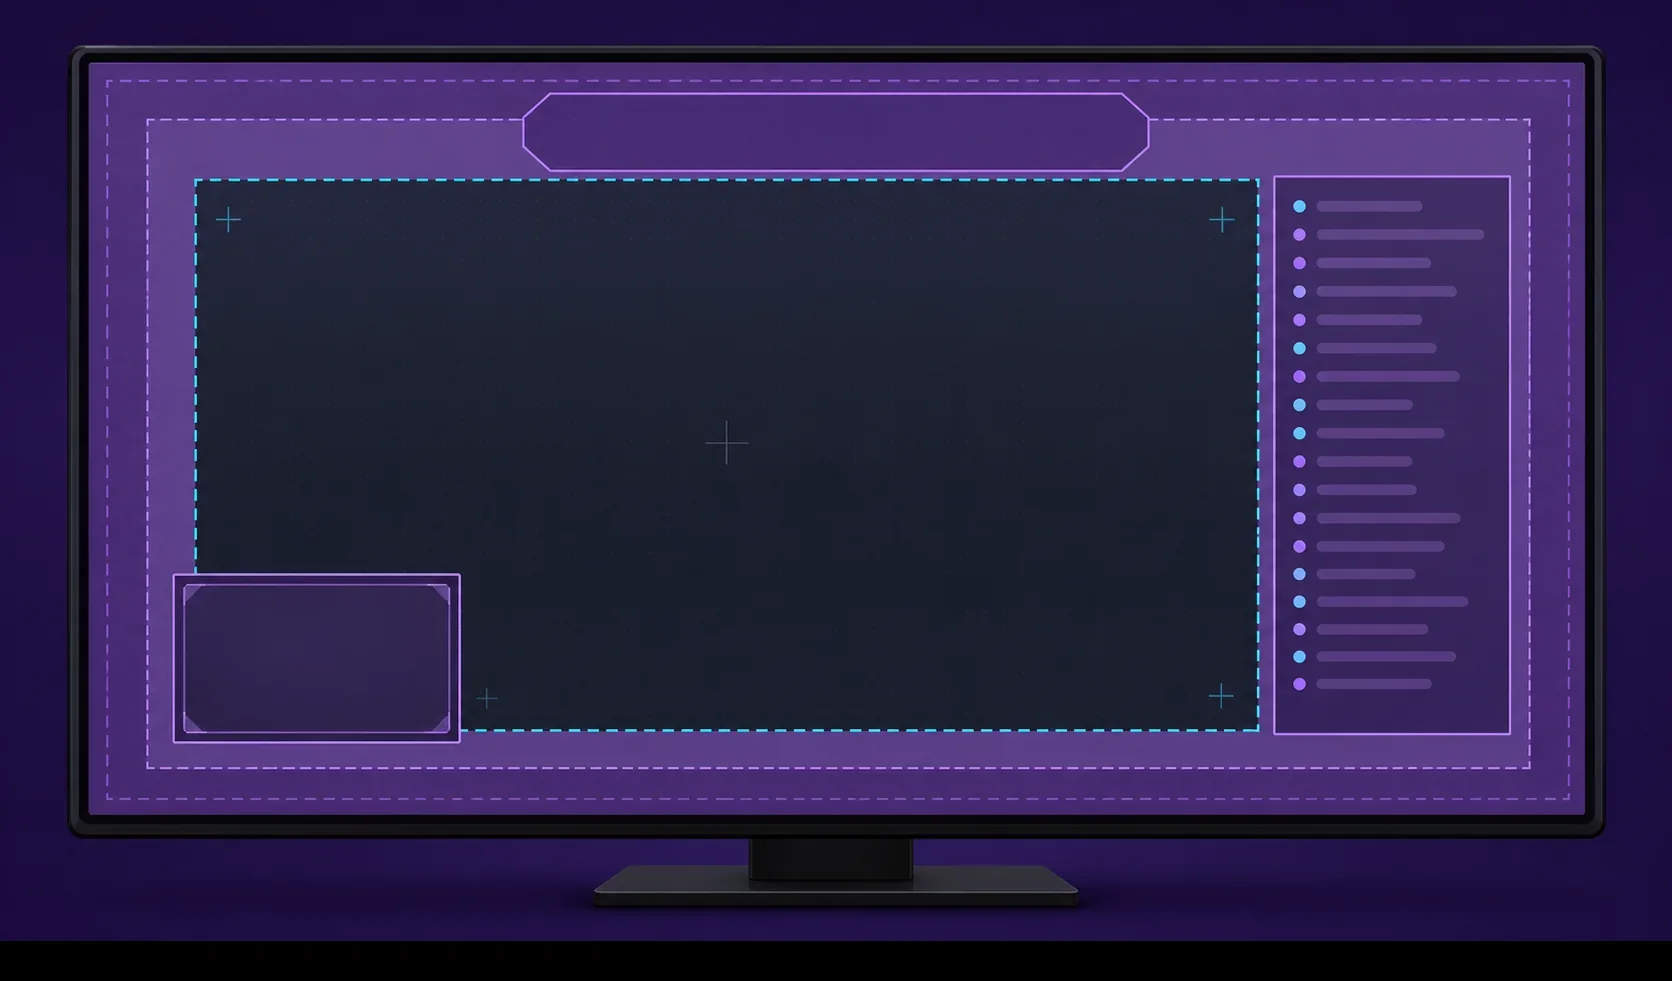
Treat the outer 60–100 pixels of a 1920×1080 canvas as a caution zone. Decorative borders may touch the edge, but names, goals, sponsor labels, and alert text should stay farther inward so they remain clear in smaller players and on phones.
Reserve the largest uninterrupted rectangle for gameplay or the main camera. Add a webcam frame only where it does not cover health bars, maps, subtitles, inventory, or competitive information. Alerts need enough empty space to animate without colliding with the camera or chat.
- Keep important text at least 60 pixels from the edge on a 1080p canvas.
- Leave extra room around animated alerts so motion does not clip.
- Check the game HUD before choosing the webcam corner.
- Use alignment guides so repeated scene elements do not jump between screens.
3. Practical sizes for common overlay elements
There is no universal webcam-frame size because the right balance depends on the game and camera crop. Start around 420×236 pixels for a 16:9 camera box on a 1080p canvas, then adjust between roughly 320 and 520 pixels wide. A square or portrait camera can use less horizontal space, but it still needs enough size for facial expression and lighting detail.
Alerts usually work best in the upper center or another intentionally empty lane. Avoid making every element permanently visible. Recent followers, chat, goals, and social handles can compete with the main content; use scene-specific versions and hide secondary widgets when they are not useful.
| Element | Starting size or zone | Adjustment rule |
|---|---|---|
| 16:9 webcam frame | About 420×236 | Increase for conversation streams; reduce for HUD-heavy games |
| Square webcam | 280×280 to 360×360 | Keep the face large enough after downscaling |
| Alert lane | 600–900 px wide | Allow motion and short text without covering the center |
| Chat panel | 300–420 px wide | Use only when on-screen chat supports the format |
| Lower-third label | 500–800 × 80–140 | Keep copy short and high contrast |
4. Starting, BRB, gameplay, and chatting scenes
A complete overlay package is a system of scenes, not one decorative frame pasted everywhere. Starting Soon and Be Right Back screens can use the full 1920×1080 canvas because no gameplay must remain visible. Gameplay scenes should be lighter. Just Chatting scenes can give the camera more space and place chat or prompts in a supporting column.
Use the same color palette, border weight, logo treatment, and alert position across scenes. Consistency helps viewers understand transitions, while scene-specific density keeps the layout useful.
- Starting Soon: full-canvas artwork with a short focal message.
- Gameplay: minimal frame, compact camera, and alerts outside critical HUD areas.
- Just Chatting: larger camera with optional chat or topic column.
- BRB: full-canvas visual with clear return context.
- Ending: simple call to follow, view the schedule, or visit another channel resource.
5. Export overlay files for OBS
Export static frames as transparent PNG when you need crisp edges and transparency. Use WebM with alpha for animated overlays when your editor and OBS workflow support it; it is usually more efficient than a large animated GIF. JPG is suitable only for full-screen photographic backgrounds that do not need transparency.
In OBS, set the Base Canvas Resolution first, add the overlay as an Image or Media Source, and fit it to the canvas. Lock sources after positioning them. Preview at full size and watch a local recording at 720p to catch tiny labels, thin lines, or compression-sensitive gradients.
- Match the canvasConfirm the OBS base resolution before exporting artwork.
- Export the right formatUse PNG for static transparency or WebM for efficient animation.
- Fit and alignPlace the source at exact canvas size and use guides for repeated positions.
- Record a testCheck motion, readability, clipping, and game HUD conflicts before going live.
6. Common Twitch overlay sizing mistakes
The most common mistake is designing at a random social-media size and stretching it in OBS. That produces soft edges, uneven line weights, and misplaced camera frames. Another mistake is putting too much permanent information on screen. If a label is not useful during most of the broadcast, move it to an alert, rotation, panel, or command instead.
Avoid judging the design only on a large editing monitor. The real test is the encoded stream viewed at smaller sizes. A clean layout with fewer, larger elements usually looks more professional than an intricate border full of tiny text.
- Do not stretch a square or 4:3 overlay to fill 16:9.
- Do not place important labels directly against the frame edge.
- Do not export tiny raster elements and enlarge them in OBS.
- Do not cover fixed game HUD areas without a scene-specific reason.
- Do not use animated GIF when a transparent WebM workflow is available.
Twitch overlay size questions
What size should a Twitch stream overlay be?
For a standard horizontal stream, design the master overlay at 1920×1080 pixels in a 16:9 aspect ratio.
Can I use a 1280×720 overlay on Twitch?
Yes, if the OBS base canvas is 1280×720. If the canvas is 1920×1080, a 720p overlay must be enlarged and may look softer.
How big should a webcam overlay be?
A useful 16:9 starting point is about 420×236 pixels on a 1920×1080 canvas. Adjust it for the game HUD, camera crop, and importance of facial reactions.
Should a Twitch overlay be PNG or WebM?
Use transparent PNG for static frames and WebM with alpha for animated elements. Use JPG only for opaque photographic backgrounds.
Does Twitch require an overlay file size?
Twitch receives the composed video from broadcasting software, so practical limits come from the editor, OBS performance, and media-source compatibility.
What is the safe area for a 1920×1080 overlay?
Keep important text and details roughly 60–100 pixels inside the outer edge, then verify the layout at 1280×720 and on a phone-sized player.