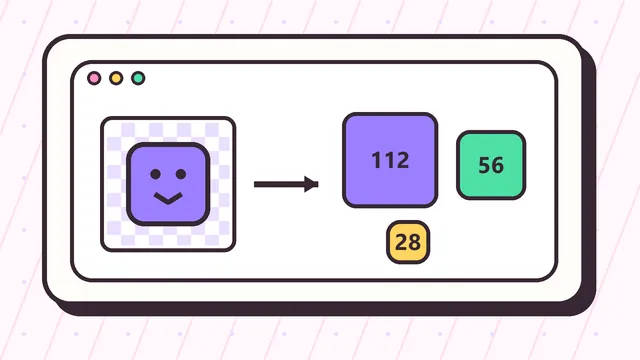
Choose an image that can survive 28x28
Not every picture becomes a good Twitch emote. The best source image has one clear subject, strong contrast, and very little background clutter. A face, expression, icon, pet head, simple logo, or reaction pose usually works better than a full scene.
Before resizing, imagine the image displayed next to a chat message. If the main idea depends on tiny text or subtle detail, simplify the artwork first. The Twitch emote resizer can create the correct pixel sizes, but the source image still controls readability.
Crop, pad, or redraw
Cropping is best when the subject is too small and needs to fill the emote square. Transparent padding is best when the full silhouette matters, such as a logo or full-body icon. Stretching should be a last resort because it can distort faces and artwork.
If a photo has a busy background, remove the background before resizing. If a drawing has thin outlines, thicken them before exporting the source PNG.
Export the final Twitch emote set
Once the source image is ready, upload it to the tool on this page and generate the three Twitch emote sizes. Download the ZIP so you keep a clean copy of the whole set.
After resizing, inspect the 28x28 preview. If the emote is too small, crop tighter. If it feels cut off, switch back to fit mode with transparent padding.
Example image to Twitch emote workflow
A simple image to Twitch emote workflow starts by choosing one clear subject. For a photo, crop around the face or reaction. For a logo, keep the symbol and remove small text. For a drawing, export a clean transparent PNG with thick enough lines to survive the 28x28 chat preview.
Upload the prepared image to the tool above, choose fit mode if the full shape matters, or crop mode if the subject needs to fill more of the square. Download the 112x112, 56x56, and 28x28 files only after the smallest preview still communicates the same idea as the original image.
What images make weak Twitch emotes
A detailed landscape, full-body photo, busy game screenshot, or logo with several words usually becomes weak at Twitch emote size. The problem is not the resize math. The problem is that viewers see the emote beside fast chat messages, so they only have a moment to recognize the shape.
If your image to Twitch emote result looks muddy, remove the background, crop closer, increase contrast, or redraw the subject as a simpler sticker-like shape. The best source images have one expression, one object, or one strong silhouette.
Transparency, padding, and safe edges
Transparent edges help an emote feel native in Twitch chat. A hard rectangular background can work for meme photos, but most channel emotes look cleaner as PNG files with transparency. If the subject touches the edge of the canvas, add a little transparent padding so it does not feel clipped.
This image to Twitch emote page is useful before upload because it lets you compare padding and crop choices quickly. When the 28x28 output has enough breathing room and still reads clearly, the larger sizes usually look polished too.
Check the final emote like a viewer
After using the image to Twitch emote tool, judge the result the way a viewer will see it: small, fast, and next to chat text. The emote should communicate one idea without requiring someone to zoom in or remember the original photo.
If the 112x112 file looks good but the 28x28 file fails, do not upload yet. Try a closer crop, remove extra background, brighten the face or symbol, and export again. The best image to Twitch emote conversion keeps the original personality while removing detail that chat cannot show.
Turn an image into a Twitch emote: example workflow
Start with one clear subject: a face, logo, mascot, or object that can communicate one reaction. If the source is rectangular, choose transparent padding when the full shape matters or a tighter square crop when the face or symbol is the focus.
After generating the three PNG sizes, inspect 28x28 first. If the result is muddy, remove background detail, enlarge the subject, or redraw the expression before exporting again. The goal is not to preserve every pixel; it is to keep the idea recognizable in chat.